Lets get right to the point. You bought a nice Samsung 4k tv and are dying to see its ultra rich picture quality but once you plug that bad boy in and setup all it necessary part, the picture is yes great but you feel like it doesn't have the sense of "4k awe" to it. You start comparing it to other non 4k tv in term of picture quality and start to doubt your own investment if it's really worth it on the purchase. Well, don't return that tv just yet. I too felt like all of you at first and through many trial and error, I believe to find that best picture quality for a Samsung 4K tv.
To get started my particularly tv model is the "UN55Hu6950" Samsung 4k 55" to avoid any confusion of model concern you might have. My rundown goes like this. The picture quality, the brightness, the color, and the back-end feature that the 4k tv have to offer. Lets start with the most important aspect about the tv itself, the picture quality.
I set my picture mode to "Movie" since I believe it is the most definitive color correct setting for gaming, shows, and movies especially Bluray. I try playing with all the other picture mode setting like Natural, Standard, and Dynamic but came across that some are either too dry in color from the start or way too contrast that even the slightest tweak can push it over too far in term of balancing color. Natural does look clear but the color seem washed out and tweaking the color still felt odd for the end picture quality. Forget about Standard, it just a big mess there, Dynamic does look good for movies but it tendency to push the contrast level a little too much that even toning it down can still manage to show it high level of over saturated contrast. The true color and clean well-balanced look shine with the Movie Mode.
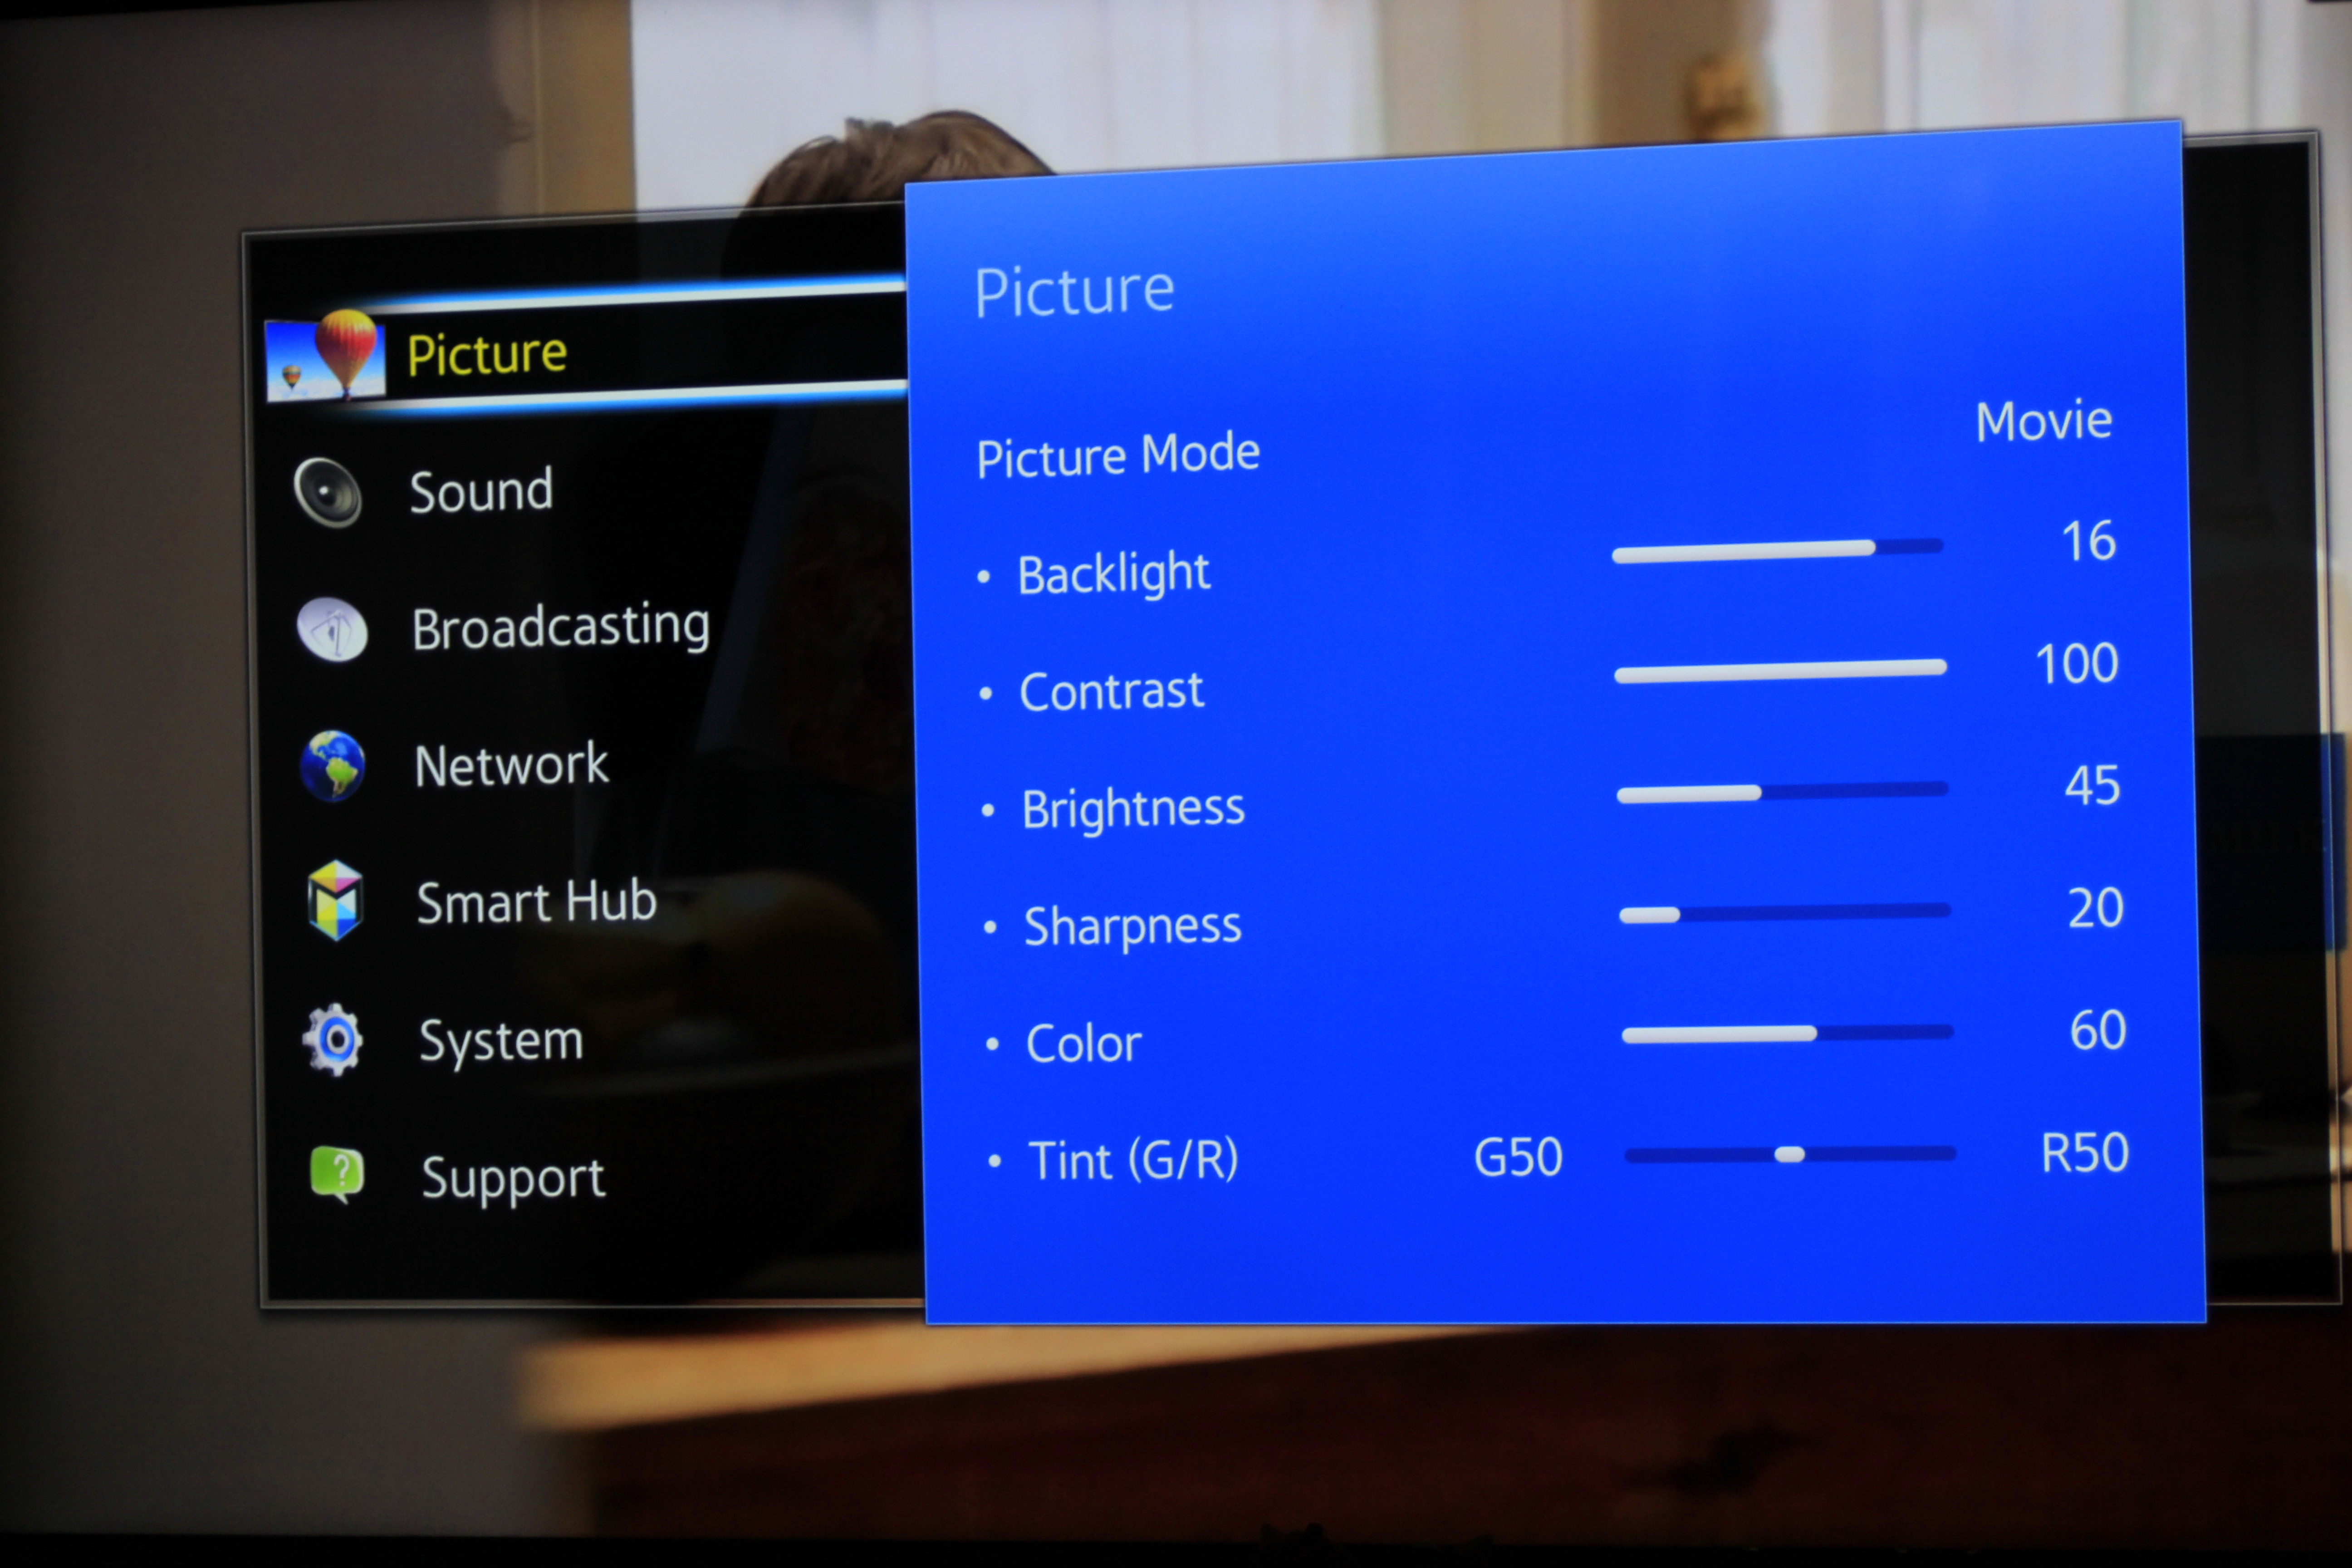
Backlight- Backlight to me is considered to be part of the overall picture in getting a well balance quality. Try playing with it a bit. DO NOT push it to the max since Samsung 4k tend to be very bright and with that level of brightness tend to make everything look dead and wash out, especially on tv shows.
Contrast- For contrast I push the setting all the way to max, don't freak out since the max setting will make sense once you reduce some feature and add some in. Everything will balance later.
Brightness- I have to play with brightness but overall time I came with a conclusion to leave it at 45. Remember not to bump up to high or lowering it too low. The 40 to 60 range is where I think the sweet spot is located. Trying playing with that area.
Color- I with the backlight down and brightness reduce, the color setting for me is set above the balance range. I left my setting on 60, remember I said to not to stress out about the max setting on contrast, will this is where I believe both contrast and color coexist perfectly. The contrast will give a sense of clarity in color to the overall picture with the boost in color setting, giving it the extra "bump" in natural tone.
Tint- You can leave the tint alone if you want. I prefer not to mess with it.
Tint- You can leave the tint alone if you want. I prefer not to mess with it.
Advance setting

For the advance setting page, I believe is the heart of the whole operation. Advance setting is the basically the front end where your tv can either be a mess with wash out or to over saturated picture or it can be an ark for the rich background image in movies, and the overall color contrast for that eye-popping quality you want.
Dynamic Contrast- This one is debatable since everyone eyes depict color differently but after months of trying out each setting, to me I felt that the contrast cause tv shows to look bland and movies to look good, or it can be the opposite around. The setting never seem to give me justice since I always had that missing feeling to it. In conclusion, I tend to turn the setting off. Yes I know turning the setting off is self explanatory but turning if off felt like both movies, games, and tv shows finally come to a balance with each other.
Black Tone- Same thing with black tone, I went through each setting but wasn't satisfy with the outcome. Although black tone does have the cinematic dark feel to it, the picture, especially the character tone gets a bit dark which can cause some of the night scene to be even worst. Let just turn that off for this tutorial. In the end it is your chose to use it or not.
Flesh Tone- This one is gotta be all on you. To me I felt that the -10 is right for the characters skin tone, and yes I have test this tool in tons of movies, games, and tv shows. The flesh tone basically does what it was name for. Putting this too high seriously exaggerated skin tone in movies and especially tv shows. Very ugly. I suggest finding a very good looking movie, pause the scene where a lot of character skin is present, and start playing with this option.
Color Space- For color space I set it to default Native setting. This option does really have an impact in the overall color quality. I think the Native setting is perfect after you successfully set the contrast and color on the main section
Gamma- Gamma really help with the overall finishing touch in brightness of the tv. Putting this to -1 felt right. Don't worry that the tv is going to be dark, cause it won't be. If you follow the previous setting above, your tv shouldn't be dark at all. Just more well balance.
White Balance I left white balance untouched. Although some people prefer the 10 points option in this setting, I felt that it is perfect in it default setting. Again, It is your decision to try it out.
Backend Feature

These setting are the backbone of the tv. There are important but are less noticeable than the previous setting, except for color tone. I will explain some of the setting that I think are important on this section
Color Tone- This setting does affect the color. Mess with this setting will automatically change your color correction as whole, making all the other setup pointless. The color option in color tone are really bad with one exception. The Standard setting is the only one that you should keep cause it blend in all the previous option and push out the final color result.
Digital Noise Filter- Most people can't really see the difference once turning on this option, however it does make the picture look cleaner if you look hard enough. Leaving it at Auto is best cause to be honest you can't really tell the difference anyway.
HDMI Black Level- There is only two option for this, low and high. Pushing this to high will increase the blackness in detail. This is up to you to choose. I prefer the low setting because high can be bit too dark for me.
Film Mode- I've done some research about this option. Setting the option to Auto 2 will work for normal standard picture quality, meaning quality that are standard and not HD. Most people recommend the other option. This is a 4k tv so setting to Auto 1 is recommended for high quality picture.
Auto Motion Plus- Unfortunately Samsung 4k tv doesn't have the 120hz motion plus like the previous generation tv that are not 4k. Yes this a real bummer for those who love fast motion on everything, but after playing with this setting and comparing through hours of analyzing movies and tv shows, the Smooth setting seems to give it fast motion rate. Not 120hz though but 60hz is fine enough by me. Don't set the option to custom and DON'T push the Judder Reduction all the way up. It does not help with the motion plus at all, actually it reduce the motion rate by half creating a weird outcome on fast moving scene.
Just a small heads up ! Make sure to set the Picture Size to screen fit. Some people believe that the option 16:9 is good but in the end, some of picture especially in movies, tend to lose some of their original screen size format.

Final Note
There you have it, the perfect setting for a 4k tv... I hope so. Remember that these setting are from a Samsung 4k tv. Trying these setting out on other tv brand may produce a totally different outcome. I hope these setting help you out on your journey in finding the perfect picture quality for these kind of tv. Remember that this is a reflection of my personal experience through many hours of trial and error and is best recommended for YOU to play around with the option yourself
No comments:
Post a Comment